Featured

Beginner Guide To MTB #2 | Beginner MTB gear part one — how to buy a bike

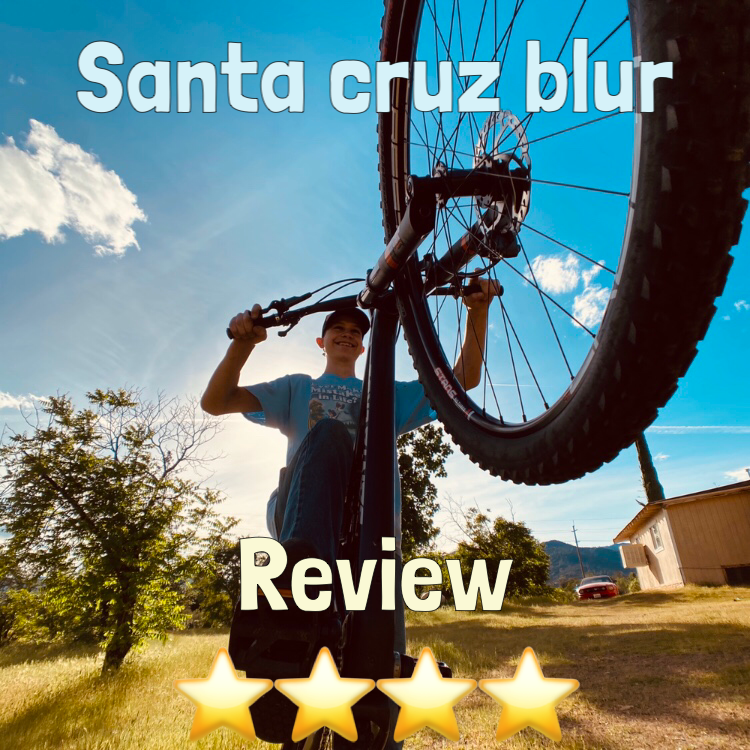
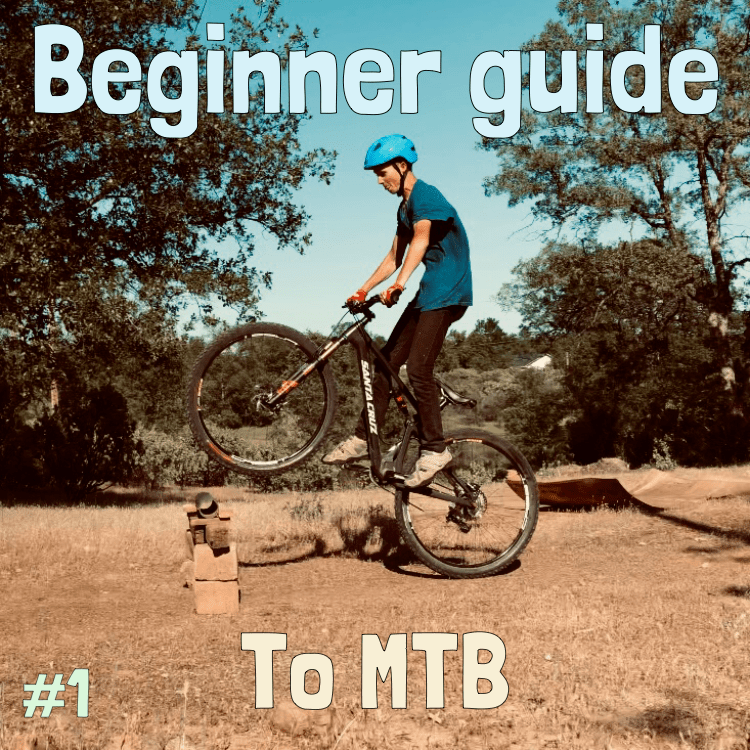
Remember last week when I asked you what discipline you wanted to do the most, and to choose the bike accordingly? Well, now it’s time to choose a bike! I’ll start by covering the online purchase experience, and move on to buying from a bike shop, and even buying used if that’s something you’re interested in. (Hit the like button or comment down below so I know you want to buy used 😉)

Let’s start online, as you’ll probably want to start here whether you’re buying new or used.

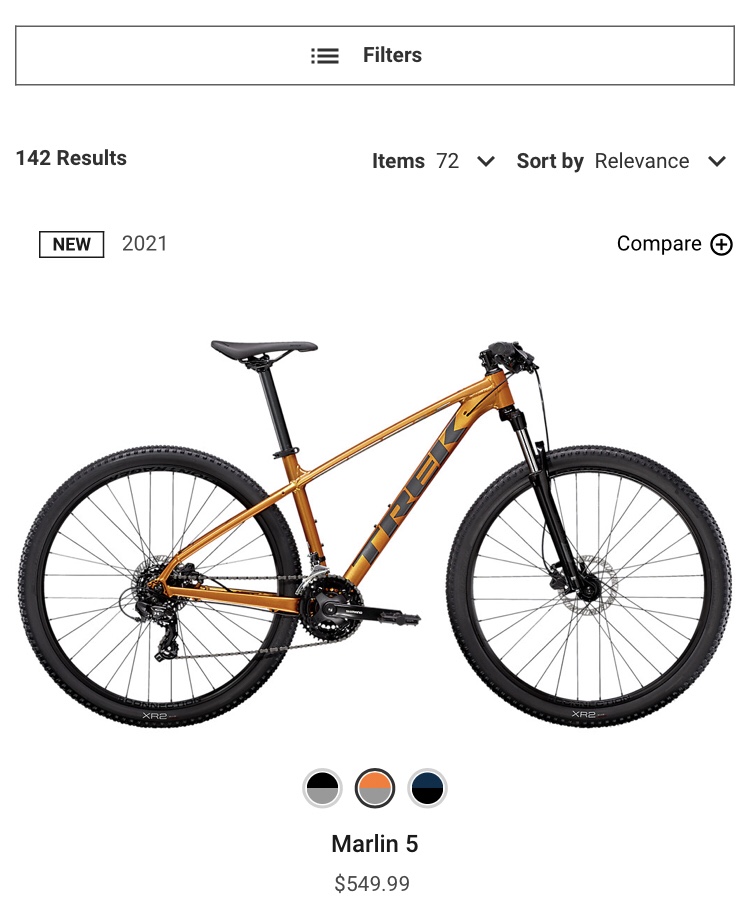
When you first get onto a bike website chances are it will look something like this 👇🏻. Just apply the filters I am about to cover and you should find a bike pretty quick.

Trek Bikes

Start by choosing a price range. Ideally, you want to have something flexible, but I know that a lot of you reading this probably don’t have thousands of dollars to drop into MTB just to try it out. So for this example, I will use a $500-$1,000 range. This should be enough for some really good beginner bikes.

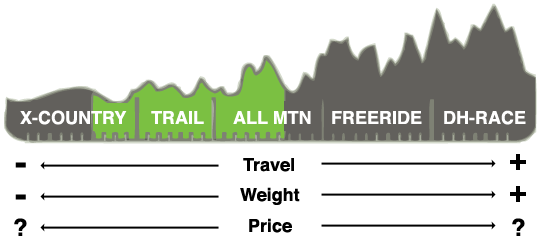
After that choose the discipline you’ll enjoy riding the most. I’ll choose ”trail” as an example.

My brother’s bike – – – – – – – – – – – my bike

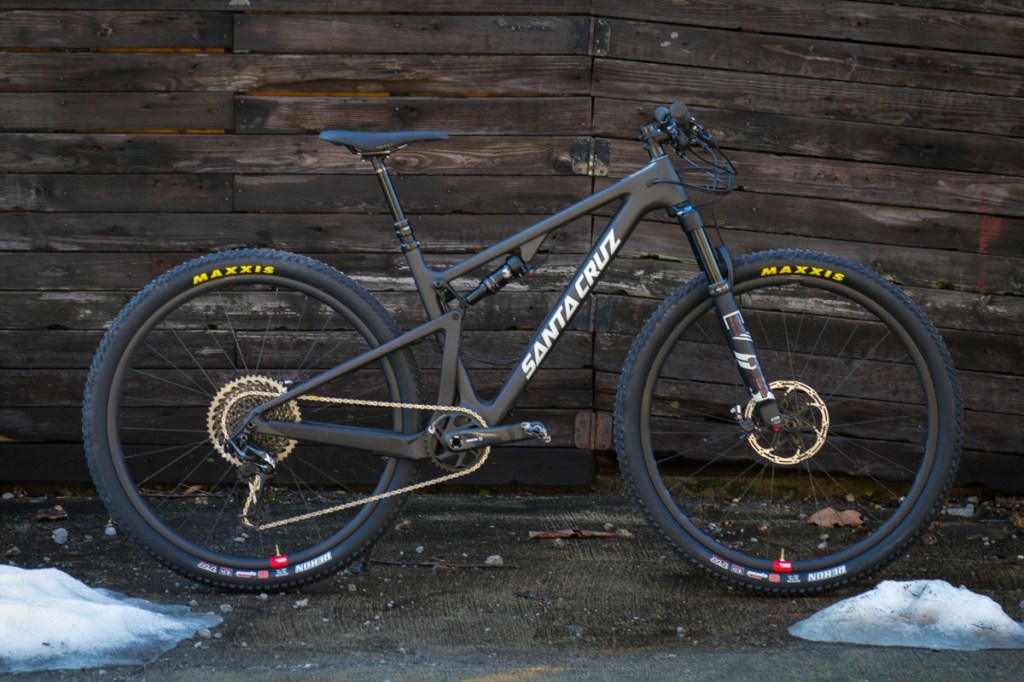
Next, decide whether to get a hardtail or a full suspension. For anyone who wants to get serious about MTB and learn intermediate and advanced skills such as bunnyhops and jumps—or just learn to ride good and fast—I would choose a hardtail. If you just want to be comfortable and don’t care about getting fast anytime soon I would choose a full suspension. Unless however, you’re getting a Downhill bike, in which case you might already know how to properly jump and bunnyhop.

For this example, I will choose a hardtail for a couple of reasons.

  • It’s lighter, so the climbs up the hill won’t use as much energy.
  • It’s less expensive and simpler to maintain because you don’t have
    1. Suspension shock
    2. Linkage to make the suspension work.
  • you don’t have suspension that will soak up your energy up the hill.
  • The audience I’m targeting with this series are generally people who want to go fast.

Some brands may have special features that could prove useful on the trail, or in the shop. These are also good things to bring into consideration when choosing a bike.

BAD!

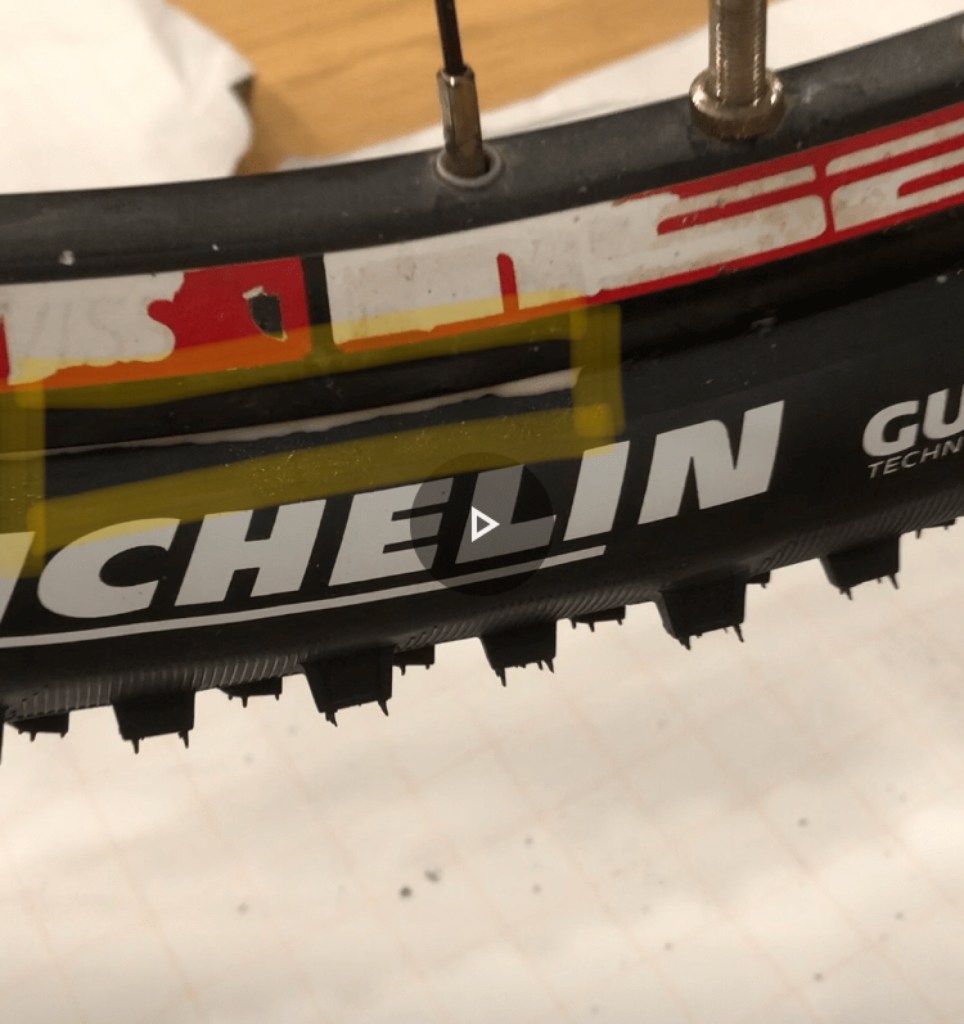
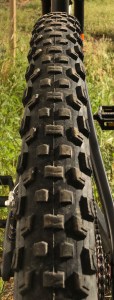
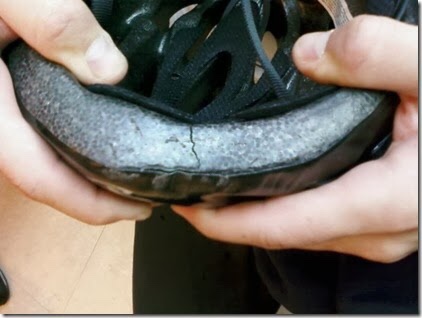
The first one is tubeless. Tubeless setup is exactly what it sounds like. It used no tubes. Instead, it uses special tires and wheels so that will hold the tire on better without the tubes. All you do is put tire sealant inside the tire and it will seal most any puncture you get on the trail. Basically, it’s a fluid that spins around in your tires, and when you get a hole, it fills it up. But it’s also designed to react to air (not the stuff in your tire) and solidify into a rubber. The advantage other than this is that you can run lower tire pressures, which gives more grip, and lower rolling resistance = you go faster. Just make sure that the tires are meant for this (tubeless ready) or end up with a situation like above. ☝🏻

Credit: theloamwolf

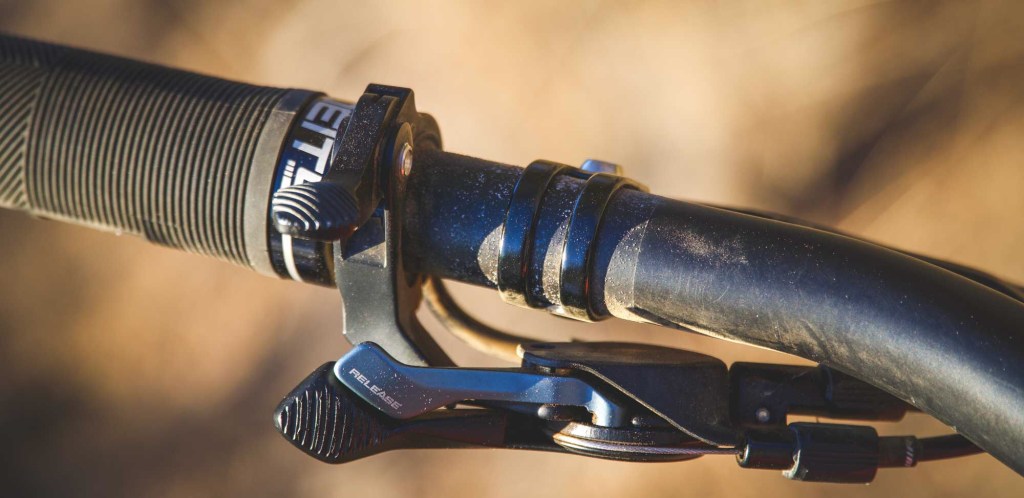
One of the things that could prove useful when you’re riding is a remote lockout. Basically, this means that you make the suspension harder and more difficult to squish. This is good for long smooth climbs like a fire road or pavement because the power you put in through the pedals will propel you forward, rather than down. Trek has some bikes with a twist grip lockout, and Scott has a twinloc system. So you can make the suspension kind of squishy that way it goes up the hill fast, but it still moves when you hit a bump, making for excellent traction.

Credit: Pinterest

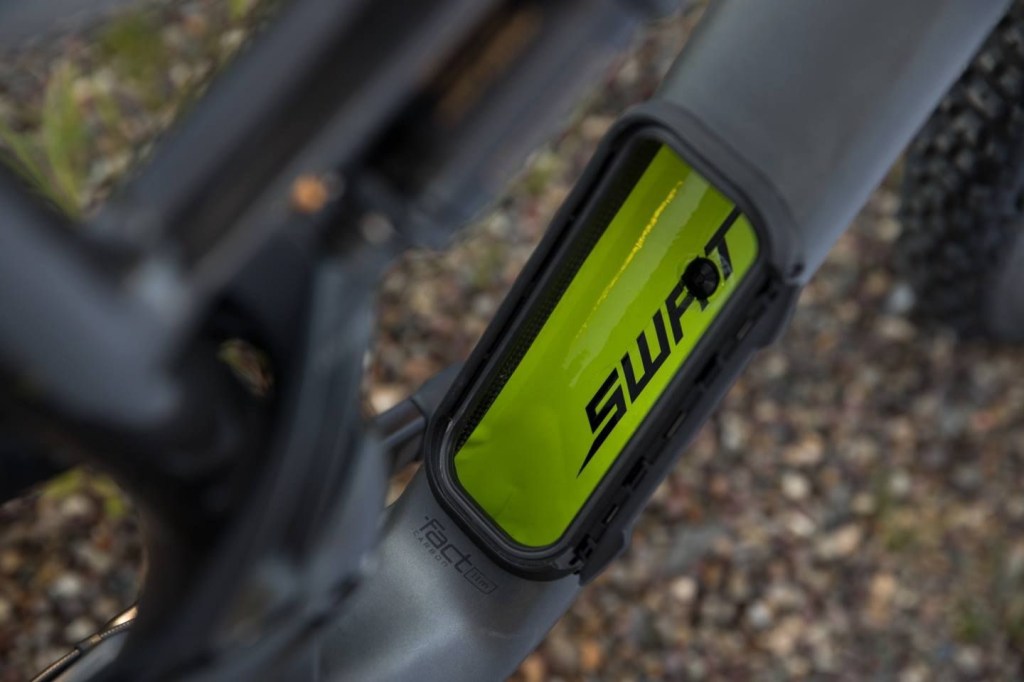
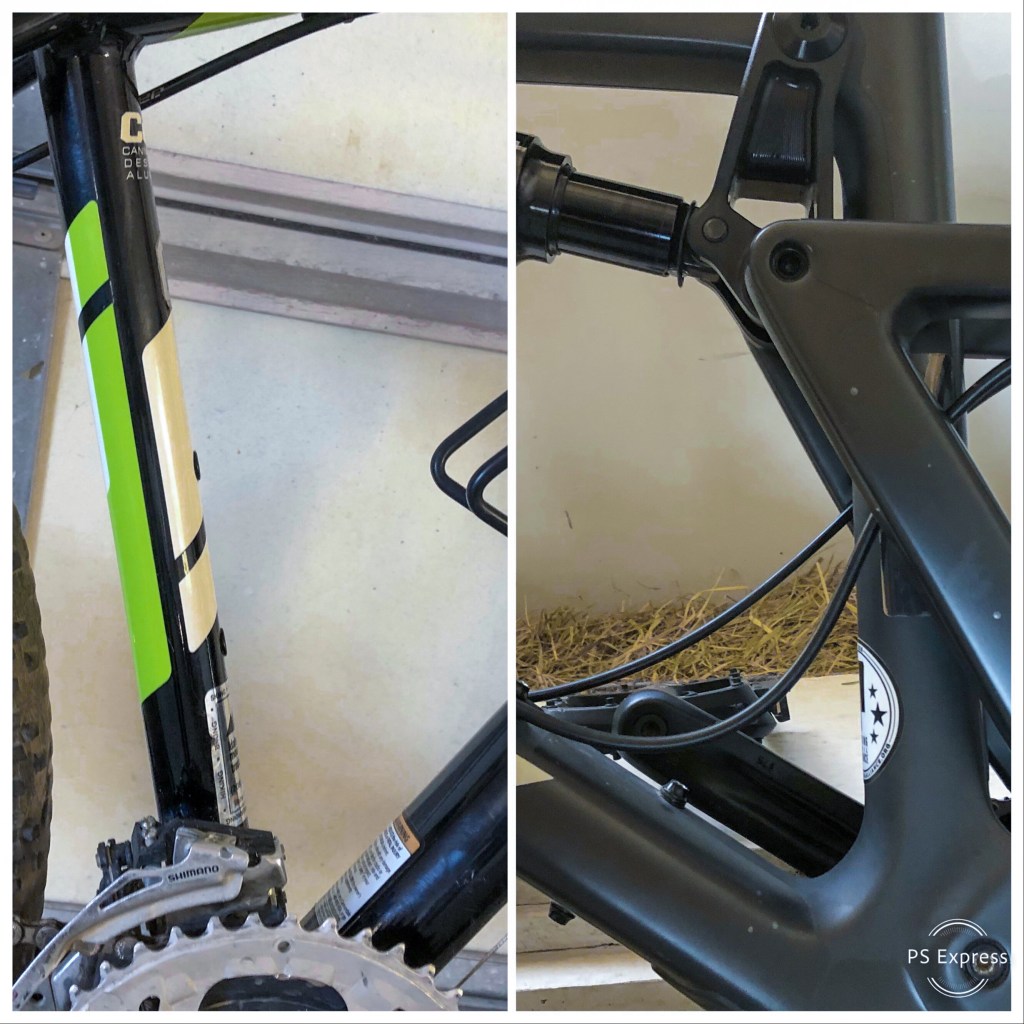
Another feature from Trek, specialized, and other brands is internal frame storage. Both sides are blocked off so you have an enclosed compartment to carry tools and snacks in when you put the lid on. And yes, these bikes won’t break under your weight. They have undergone serious testing to ensure your safety on the trail.

You may find more special features that I won’t cover here because the list could get extensive and unnecessary.

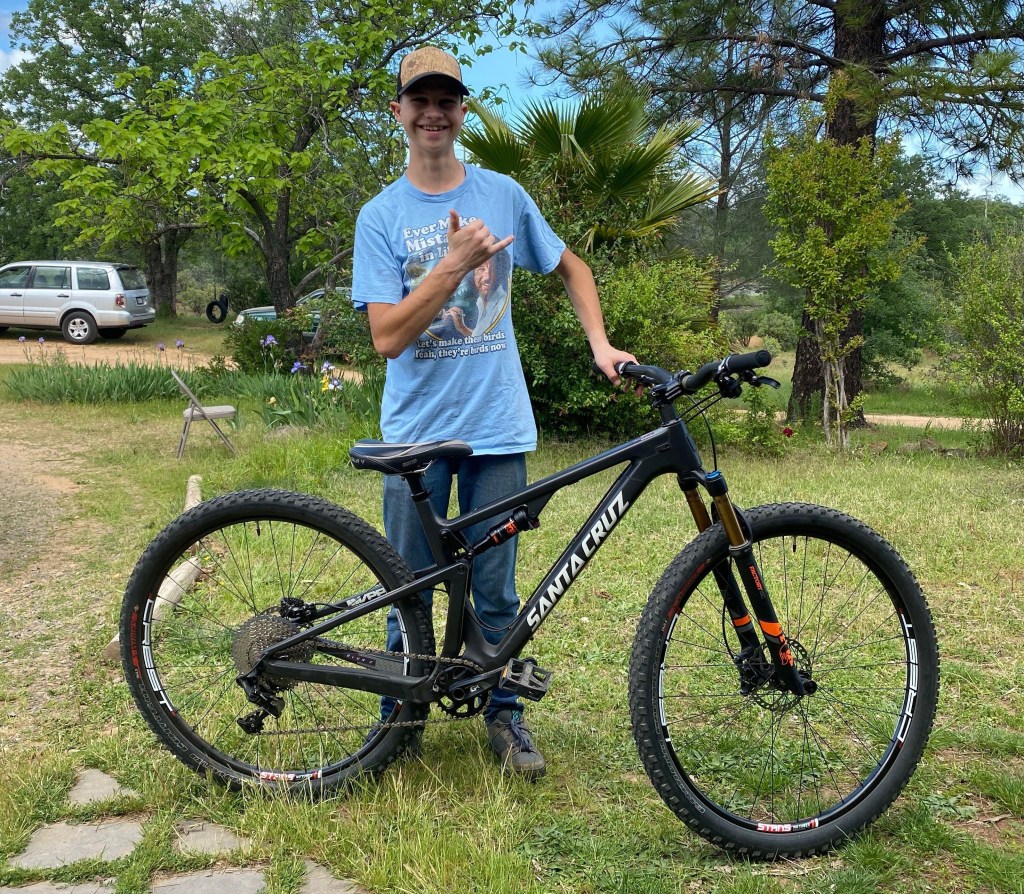
Spend some time looking at different bikes from different brands online that match the filters you chose, and narrow it down to just a few. I’ve chosen the three bikes below.

I have chosen each bike for good reasons, and I’ll explain them to you. starting with the trek.

This is the trek Marlin 5. It costs $549.99.

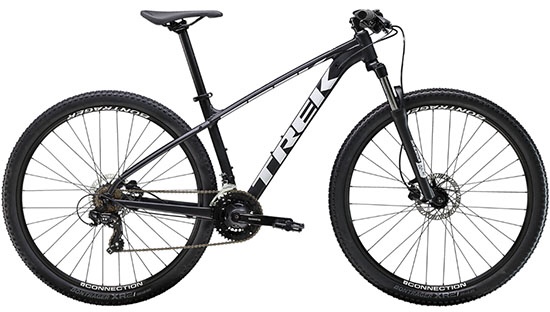
The Trek Marlin 5 is super affordable. It’s one of the cheapest bikes you can find that you could start riding on. Personally, I would get a bike that is pricier than the Marlin because of a few reasons.

  • Something that is more expensive can be expected to follow more modern standards, making it easier to repair and upgrade parts.
  • A more expensive bike can be expected to be more robust and better built, which means I can sell it later and use the money to get my next bike.
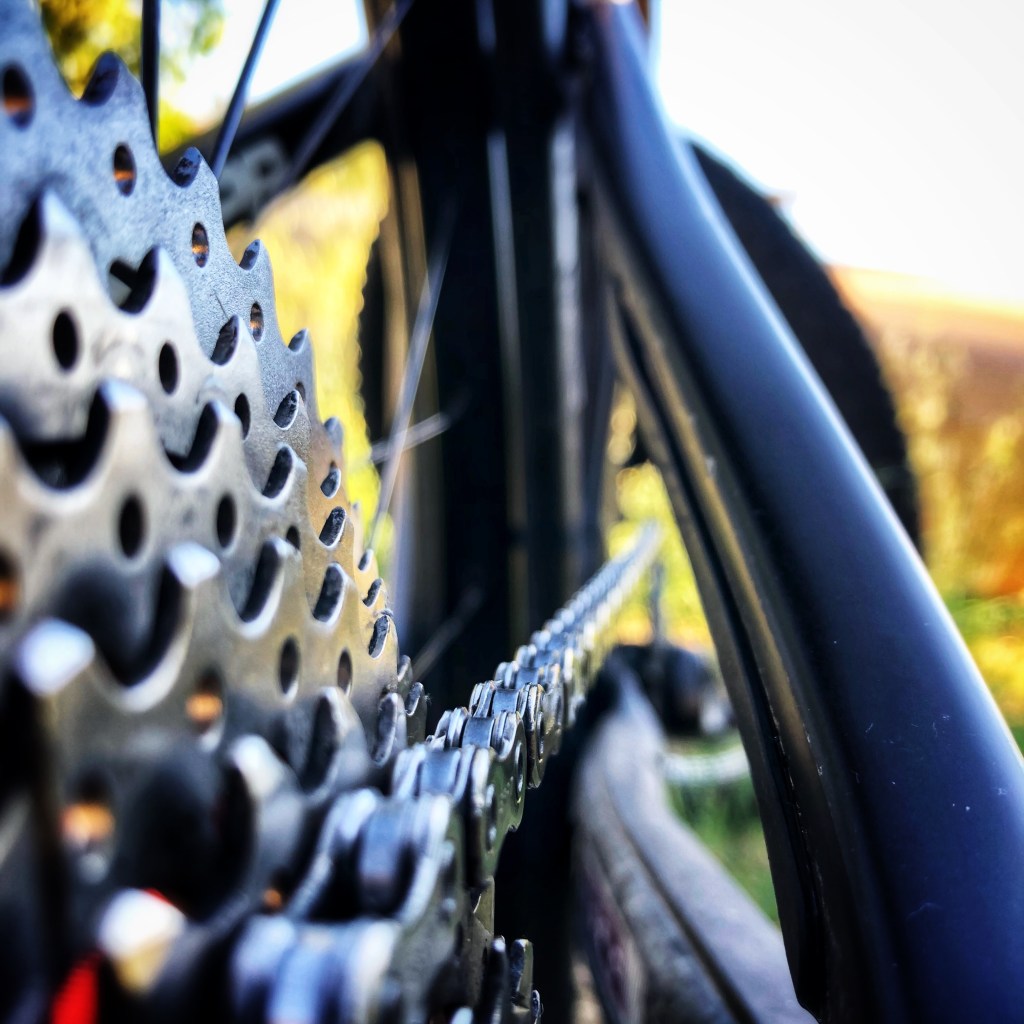
  • Something that costs more comes with better parts to start, such as a 1x (pronounced one by) drivetrain, which is more reliable than a 2x or 3x.

The only pro about something this cheap is that it’s this cheap. I’m sorry, but try and aim a little higher if you can.

This is the Diamondback hook. It costs $700.

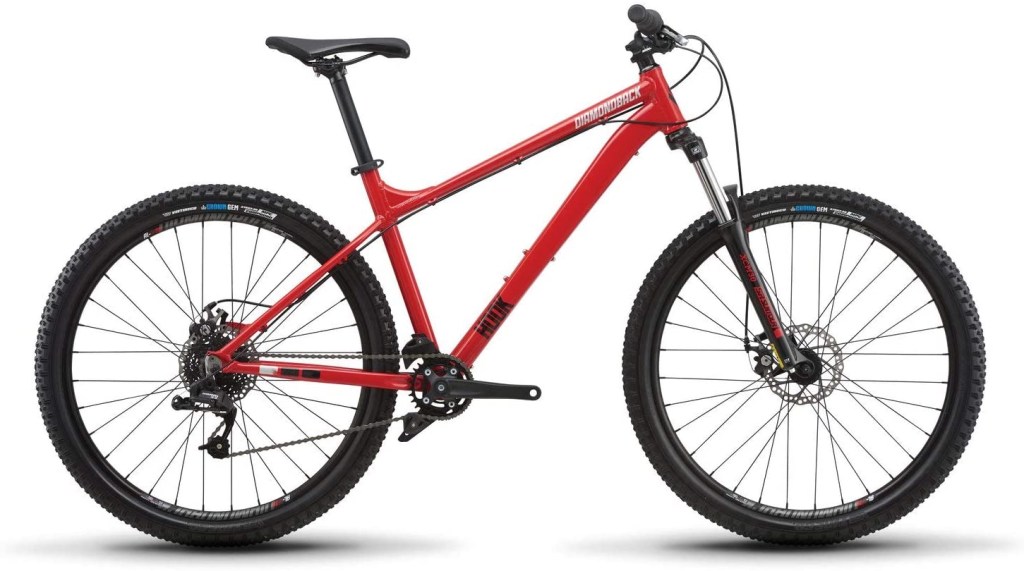
Next up is the diamondback hook. This bike is right in the middle of the price range I was aiming for. I might choose this bike for a few reasons.

  • As I mentioned above, it has better parts because of the price.
  • The “geometry” (the angles of the bike frame) is more modern and will be better for downhill riding.
  • It also has what’s called a chain guide, to help keep the chain from falling off the front. This means you can take it on very rough trails and the chain likely won’t ever come off.

One of the only problems with this bike is the coil suspension. It likely won’t be very comfy and isn’t adjustable.

This is the Kona Mahuna. It costs $999.

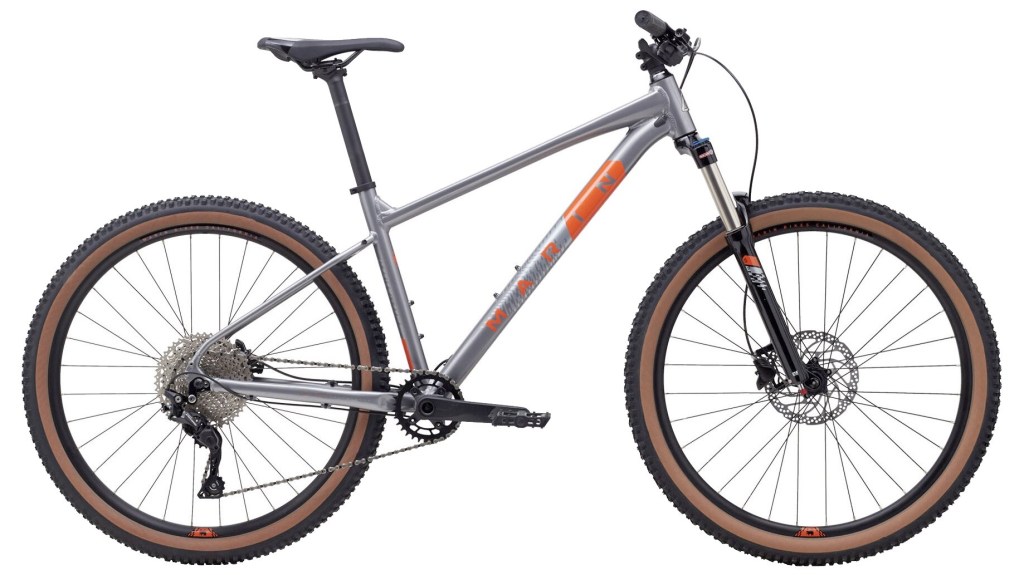
Lastly, we have the Kona Mahuna. It’s the highest quality of the three for a few reasons.

  • It’s ready to convert to tubeless.
  • It has air suspension.
  • It has good grippy tires.
  • It has a 1×11 drivetrain (1 gear in the front, 11 in the back)
  • It has a clean design.
  • It has tan sidewalls…Just kidding, the color on the side of a tire doesn’t change the performance. I just like the way they look.

It’s at the top of the price range I selected, and you get your money’s worth from it, so I think I would choose this bike.

Ultimately the choice is up to personal preference, and there are lots of other bikes from other brands. Just spend some time searching for a bike you like and think about it. Don’t choose one the day you read this. You may decide that you don’t like the bike soon, so keep looking until you know you found the bike for you.


Let me know down below which bike you would choose if you had $1,000 to spend!

Featured

Santa Cruz Blur review

As you may know from my Instagram, I worked during the winter with @Redding_Trail_Alliance (RTA) so I could buy a new bike. Not just any bike, a really good one. Full suspension too! And I bought a like-new 2019 Santa Cruz blur C. Today I will give a 2.5-3 month review. Before we start, let’s talk about what I’m comparing it to, and what I’ll rate it on.

I’ll be comparing the 2019 Santa Cruz Blur lineup simplified to the frame material. So when I refer to A (Aluminum), C (Carbon C), and CC (carbon CC), I’ll be referring to how high or low end the build is. A is the “low” end model, C is mid-range, and CC is high end.

I’ll be rating this by the build, based on the frame material, though components may also be better or worse than lower or higher-end models.

Let’s start with the frame material. I have the C model, so the whole bike weighs only 23lbs. I have been less than kind to this bike riding wise (not maintenance wise 😉) and it barely has a scratch! The only reason it does is because of transportation in the fifth wheel. I give it ⭐️⭐️⭐️⭐️.

Next up is the suspension, which may be different from the A and CC models. I have Fox suspension front and rear. The front is evol and Kashima coated. The rear is neither. Santa Cruz equips their bikes with VPP suspension, which ramps up quickly, but still takes the smaller hits really well. I am especially satisfied with the rear suspension’s performance. Another advantage is the lockout and half lockout options for fork and shock. I give this also ⭐️⭐️⭐️⭐️, as it isn’t the highest-end available.

It’s a little over-edited I know. Sorry.

Next, I’ll cover the drivetrain. This will be different on the A and CC models. I have the Sram GX Eagle shifter, chain, and derailleur. The cassette is a sunrace 11 speed. It shifts quickly, and pretty smoothly. It’s not the XO1, but it’s still very good! Again, ⭐️⭐️⭐️⭐️.

Now I’ll look at the cockpit, which will vary drastically for A and CC. I won’t go too deep here, so suffice it to say that I like the Renthal Fatbar Lite Carbon at 760mm. The shifters are nice, and the brake levers adjustability is a dream. The grips however…oooohhh I don’t like those. They wore out very quickly indeed. And are so bad now that I have to wear gloves or else I’ll get all kinds of gunky rubber stuck to my skin. When I was riding they seemed to soak up skin like a sponge, getting ready to squeeze it out when I handled them a little more. Needless to say, they are specialized. ⭐️⭐️⭐️, but the grips are 1-2 stars all on their own.

On the theme of specialized, let’s look at the tires. These tires were equipped by the previous owner, so I cannot count them in the overall score. Like the grips they wore out very quickly. Typical me wanted to ride some rocks, and promptly got a puncture in the sidewall that sealed very reluctantly, and keeps reopening even on smooth trails, and leeks quickly even when not ridden. ⭐️⭐️ for sure.

Another fundamental part of the bike—brakes! I have Shimano’s deore xt 1 pot xc brakes. Idk the rotor size, but it’s small in the grand scheme of things. The rear calipers have cooling fins though, and I haven’t ever had a problem with overheating the brakes! That and the adjustable levers gives this a rating of ⭐️⭐️⭐️⭐️⭐️!

The wheels and hubs are nice, but my favorite part is the fact that they are boost! They are thick, and stiff, and feel amazing! This will vary for A and CC. Wheel build is about ⭐️⭐️⭐️.5.

Frame design shall be our next subject of review. I really love the look, it doesn’t look like a bunch of pipes welded together. It looks like a master-crafter molded the frame seamlessly. Aside from the linkage of course. Speaking of which, I do have one complaint. Behind the Bottom Bracket, there is a part of the linkage that reaches very far back, and is pretty difficult to clean by any means other than the jet setting on a hose. And I’m not willing to jet my bearings. Aside from that, I would’ve rated it five stars. So instead I rate it ⭐️⭐️⭐️⭐️.

Now let’s talk about geometry. I won’t give the specific numbers, but the head angle is steep for climbs, bb is low enough for descents, chainstay is nice and short (I really like this!!), so I’ll rate the geometry a ⭐️⭐️⭐️⭐️⭐️. Perfect XC race bike geo!

One more thing I’d like to point out about this bike is that the saddle was swapped out, and I dislike the this one very much. It provides very little comfort or support for my sit bone, and I will be buying a new one as soon as I can. ⭐️⭐️.

-Overview-

I must say that my riding experience has been generally very pleasant. I have put about 600 miles on the bike already, and I can’t wait to put some more on it! I have very few complaints, and I think that at the $4,000 mark you are getting every penny’s worth. The bike has room for upgrades, but it’s not at all necessary. It will last you a good few years no problem, and it is very efficient up the hills. General rating is ⭐️⭐️⭐️⭐️ only because not everything is top end.

Would I recommend this bike to a friend? YES!!! 200% yes. I would recommend it time and time again. The bike can handle black diamond tech, and can jump pretty good. And it’s not even designed for that!

If you’re in the market for a new xc bike, I would give the blur a test ride and see what you think!

Have any questions? Feel free to ask them down below!

Beginner Guide To MTB #3 | Beginner MTB gear part two — helmet, hydration + more

Now there is a BOATLOAD of MTB gear you can get, and I can’t give you directions for all of them. So I’ll give you a list of items worth considering no matter what discipline you chose, and then some discipline-specific items.

Disclaimer: All protective gear examples and links are certified to protect you from crashes.

Credit

Before we start it’s EXTREMELY IMPORTANT to know that if you have had a major crash while wearing a helmet you will have to replace it promptly. Helmets are one use only items and should be checked for cracks or other defects after every crash.

Let’s start things off by listing all the gear that is essential (‼️) to go on a ride, and move on to other things that are nice to have.

Credit
  • ❗️You ❗️
  • ❗️Bike ❗️
  • ❗️Helmet❗️
  • 1-2 spare tubes
  • Small hand pump and/or 1-2 co2 inflator
  • Tire plugs (tubeless)
  • MTB shoes
  • 1-2 water bottles/ hydration pack
  • multi-tool
  • Riding Jersey(s)
  • Riding pants/shorts
  • Floor pump
  • Shock pump
  • Allen wrenches
  • Knee pads
  • Gloves
  • Glasses/goggles
Credit

The easiest way to buy this stuff is to go to your local bike shop. Introduce yourself as a beginner and tell them what riding you’ll be doing and what you want to get. They can probably give you advice on what to buy and what not to buy as well, so don’t be shy.

If you don’t want to go to a bike shop I suggest you go online and search (as an example) “MTB trail helmet” and read reviews and watch YouTube reviews to find out what would be a good fit for you.

If you take the online route I would start by getting a helmet + other protection if needed, then spare tubes, hand pump/co2, water bottle/hydration pack, glasses, and finally gloves. This is a good way to start.

However, you may not be able to afford everything on my list. So just work your way from the start to the end when you can. Meaning you would start by getting a bike, protection, and a source of water. After that start buying gloves glasses and other such items.

Here is a list of items you may want to consider buying based off of the discipline you choose.

Credit

Cross Country

  • Chamois (pronounces shammy)
  • Chamois butter (to reduce friction between you and the chamois
  • Xc Clipless pedals and shoes (intermediate + required)
  • Riding jersey with back pockets
  • Power meter (for those serious about working out/racing)
  • Heart rate monitor (for those serious about working out/racing)

Trail

  • Riding jersey (with it without back pockets)
  • Water proof Riding pants
  • Knee pads
  • Trail Clipless pedals and shoes (intermediate + required)
  • Power meter (for those serious about working out/racing)
  • Heart rate monitor (for those serious about working out/racing)

Dirt Jump

  • Knee (+ elbow) pads
  • Uhhh…Shovels
  • Wheelbarrow
Credit

Enduro

  • Baggy riding pants and jersey
  • Knee pads
  • Chest protector
  • DH Clipless pedals and shoes (intermediate + required)
  • Power meter (for those serious about working out/racing)
  • Heart rate monitor (for those serious about working out/racing)

Downhill

  • Chest and back protector
  • DH Clipless pedals and shoes (intermediate + required)
  • Power meter (for those serious about working out/racing)
  • Heart rate monitor (for those serious about working out/racing)

Freeride is the same as DH, so that makes things easier for both of us.

You don’t necessarily need everything here, but I wanted to make sure I included everything available to you as a beginner and maybe intermediate rider.

To all the intermediate and advanced riders, did I miss anything that should be included on this list? Let me know!

If you don’t know what bike to get, let me help you. Just click this link, and I’ll see you there.

Types of MTB | Beginner Guide To MTB

Today is the day that I publish the first addition to my new series “The Beginner Guide To MTB”. To start, you need to answer a question. That question is..,

What kind of Mountain Biking do you want to do? Yes, there are lots of MTB disciplines to choose from! 6 to be precise. “What if I wanted to do several disciplines?” That’s a good question. Simply, the answer is yes. But so far as I can tell, you can’t race competitively in several. But you can of course ride them all! To start, choose one that you think you’ll be doing the most, so you can buy the appropriate *kit. Let’s start with the least extreme skills-wise and work our way up.

Credit: Bike Rumor

1. XC (Cross Country). Xc is my personal favorite. Not because it’s “easier”. Xc is typically less “gravity” oriented. Meaning that you’ll be pedaling a lot more, and you won’t be losing 1,000s of feet of elevation at a time. The terrain is often smoother, and more hilly than other disciplines. But that’s not to say that difficult tech isn’t there. It has the most technical climbs you’ll find, and XCers love it that way. We also enjoy long rides that sometimes can stretch up to 100 miles or more for the experienced rider, so we typically have the best endurance out of the bunch! 😉 xc houses the lightest bikes of all. Some bikes without rear suspension weigh as little as 14 pounds. Usually however their around the 20lb mark.

Credit: Altitude Bicycles

2. Trail. I know, it sounds weird. Trail riding is what I imagine the majority of people enjoy, in fact, I’d go as far as to say I’m mostly xc, but part trail. If I didn’t do XC, I’d do this. You can ride down really long descents (downhill trails), but usually have to pedal to get to the top. They also include much more **features, such as bigger drops, wallrides, and skinnies. Which makes it a good source of adrenaline. That’s why this is more of the “hobby” style discipline. It also prefers longer travel bikes with beefier components on it, so they usually weigh between 20-30lbs.

Credit: Scotty Laughland. Here is his YouTube channel

3. DJ (Dirt Jump). This is what you call an awkward mix of a trail bike and a BMX. As you might have guessed, these bikes are designed for steep dirt jumps and stunts. This is a gravity oriented discipline for sure. In fact, it’s considered rude and sometimes disrespectful to the builder if you pedal on a dirt jump trail, because everything is built so that you don’t have to if you use good technique.

Credit: Rel_cyclery from Instagram

4. Enduro (formerly all-mountain). This is for the hardcore adrenaline junkies who still wanna pedal their bikes occasionally. Enduro bikes are usually pretty heavy and have lots of suspension travel (how much the suspension moves) compared to xc or trail. They often race on trails nearly as steep and technically difficult as DH(6.) plus they have to pedal up 1,000s of feet a day, as they don’t get to use cars to get to the top of the trail during races.

Credit: VitalMTB

5. Freeride. If you know what this means in the snowboarding world you can probably understand what it means here. It’s part DJ, cuz they do big jumps, but mostly DH, cuz it’s mostly like that but with more jumps. Unlike DJ however, the jumps aren’t very steep. Instead, they are very long, sometimes reaching lengths of over 80’! Their bikes are practically the same as a DH bike, so we’re going to call them just that.

Credit: RedBull

6. DH (Downhill). This is arguably the most intense discipline of them all. World Cup DH races use the gnarliest, and steepest trails on the planet. But you also ride Bike parks with a DH bike, in which case the trails may be smooth, but the turns are taaaallll and the jumps are loooong. This is the discipline for the people who don’t ever want to pedal Aup a hill, only down. Usually, you get on a chair lift or drive to the top. These bikes are the beefiest, heaviest of them all, weighing in at about 30-40lbs! A 40-pound bike! Sheesh🙄.

Before you start looking for for a bike to buy, you need to decide what type of riding you want to be doing the most, and buy the appropriate gear. And that’s exactly what I’ll be covering next time, so tune in next week to learn about Beginner Mountain Bike gear!

*kit. Your kit is what us MTBers (Mountain Bikers) call your bike, bike equipment, and clothes collectively. So if someone tells you that “you have some nice kit!” They mean you look good. Like a proper Mountain Biker. **features are what we call an obstacle or “feature” on the trail. Examples would be jumps, drops, wallrides, rock gardens, skinnies, berms, etc. for an extensive list with pictures, visit this link.

How To Start Mountain Biking 🚵 (Intro)

Out of the one billion+ people who regularly ride bikes, only 40 million people Mountain Bike (MTB), and even less ride on a daily or weekly basis. That means that there is a large number of people who probably want to start mountain biking, but don’t know where to start! I’ve been riding for over a year now, and I’ve learned a lot since then. I may not be world-class, but I picked things up fairly fast and I know enough to help YOU get started in this wonderful sport we call MTB.

This post is the start of a weekly series I’m going to call “The Beginner Guide To MTB”. As of now I have 7 posts planned, but that may change in the future. If you have any suggestions or questions comment down below and I’ll either answer directly, or make a post covering the topic.

Here’s a table of contents so you can see what posts are scheduled. Whenever I publish a post I will link to it here so you can catch up on what I’ve added.


1. Types of MTB

2. Beginner MTB gear #1

3. Beginner MTB gear #2

4. How to use a MTB properly

5. MTB trail etiquette

6. Your first MTB ride

7. How to conquer your fear on the trail

8. MTB 101, progress to intermediate trails fast!


Design a site like this with WordPress.com
Get started